
Summer on the porch does a lot of good for many houseplants.
They get brighter light, fresh air and the occasional gentle rain.
Then the evenings start to cool, and it is time to bring them back inside.
This is the moment when small visitors often come along for the ride.
A pot that sat on damp ground for months can hold roly-polies underneath.
Earwigs may be tucked into a flower cluster.
Tiny insects may be hiding under the leaves.
None of this is a disaster.
A calm, unhurried check before the plants cross the threshold keeps most of it outside.
This checklist draws on the University of California Statewide Integrated Pest Management Program and the University of Maryland Extension.
Why a Return Check Matters
Outdoors, pots become part of the garden.
Moisture-loving animals shelter under them, and insects move between nearby plants.
The UC program describes pillbugs and sowbugs hiding under debris and low plant parts.
It describes earwigs spending the day in dark, cool and moist places.
Its list of earwig hiding places includes flowerpots and other garden objects.
Indoors, there are no birds, toads or other predators to keep these visitors in check.
A few unnoticed insects on one plant can spread to the rest of your collection.
That is why a few minutes of checking pays off.
Step 1: Pick a Calm Spot and a Little Time
Do the check outside, in good daylight.
A table, a sheet of newspaper and a soft cloth are enough.
Work on one plant at a time.
If you have many pots, spread the job over two or three days.
Rushing is how a pot full of passengers slips through.
Step 2: Look Under and Around the Pot
Start at the bottom, where most visitors hide.
- Lift the pot and look at its base and the drainage hole.
- Check the saucer and empty any water left in it.
- Look at the patio or ground right where the pot was sitting.
- Notice any small gray animals that roll into a ball or scurry away.
Those are pillbugs or sowbugs.
The UC program explains that they feed mainly on decaying plant material and need moisture.
Brush them off outdoors, where they can keep breaking down fallen leaves.
Our guide to pillbugs and sowbugs in pots explains them in more detail.
Step 3: Clear the Soil Surface
Dead leaves and loose debris on the soil give visitors food and shelter.
The UC program recommends reducing decaying organic matter on the soil and keeping its surface less wet.
- Pick off fallen leaves, petals and twigs.
- Remove any weeds that sprouted in the pot over the summer.
- Scrape away a crusty or moldy top layer if there is one.
- Top up with a little fresh potting mix if the soil has sunk.
Step 4: Check the Leaves, Top and Bottom
Next, look at the plant itself.
- Turn over several leaves on every side of the plant.
- Look along stems and in the joints where leaves meet the stem.
- Check new growth, flower buds and tight clusters.
- Watch for sticky spots, fine webbing, cottony tufts or small moving specks.
Each of these signs points to a different visitor.
Sticky leaves often mean aphids or other sap feeders.
Fine webbing can mean spider mites.
Cottony tufts usually mean mealybugs.
If you find any of these, follow that guide before the plant comes inside.
Step 5: Do a Gentle Night Check for Earwigs
Earwigs feed at night and hide during the day, so a daytime look can miss them.
The UC program recommends simple traps made of rolled-up newspaper, cardboard or a short piece of hose.
- Set a rolled newspaper next to each pot just before dark.
- In the morning, shake it over a container of soapy water.
- Repeat for a night or two until the traps come up empty.
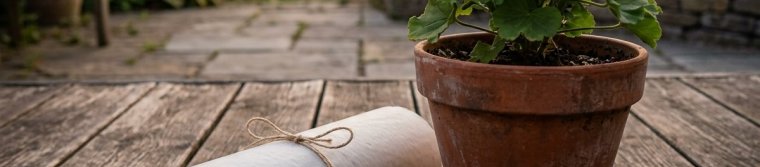
Also give flowering plants a gentle shake over a sheet of paper.
Earwigs often hide inside flowers.
Our calm guide to earwigs covers the full trapping method.
Step 6: Rinse and Wipe
A light cleaning removes dust, loose debris and many small insects.
- Rinse the leaves gently with a hose on a soft setting, or in a sink once indoors.
- Support the stems with your hand so they do not snap.
- Wipe large, smooth leaves with a damp, soft cloth.
- Wipe the outside of the pot and scrub the saucer.
Let the plant drip dry outside before you carry it in.
Our guide on how to clean houseplant leaves shows a gentle routine.
Step 7: Keep Returning Plants Apart for a While
Even a careful check can miss a few eggs or very young insects.
So give the returning plants their own space for a while.
- Group them in one room or on one shelf, away from your other plants.
- Check them again each time you water.
- Move them into their usual places once they look clean and settled.
The same idea works for plants from the store.
Our checklist for inspecting a new houseplant walks through a simple quarantine.
Step 8: Water Less Than You Did Outside
This step is easy to forget, and it matters a great deal.
Outdoors, sun and wind dry pots quickly.
Indoors, the same pot dries far more slowly.
The University of Maryland Extension recommends watering by need rather than by a fixed schedule.
It suggests checking the soil about two inches down before watering.
It also warns never to leave a pot sitting in water.
Soil that stays wet invites the same visitors you just removed.
The UC program on springtails advises letting soil dry between waterings and keeping saucers empty.
Our guide on how to water indoor plants explains the routine step by step.
Step 9: Help the Plant Adjust to Indoor Light
Rooms are much dimmer than a porch, even near a window.
Some plants drop a few leaves in the first weeks after moving inside.
That is usually the plant adjusting, not a new pest.
- Give returning plants the brightest suitable spot you have.
- Keep them away from heating vents and cold drafts.
- Pick up fallen leaves so they do not rot on the soil.
Keep the Doorway Quiet Too
Some visitors walk in on their own, especially in cool or dry weather.
The UC program suggests weather stripping, door sweeps and sealing gaps.
It also recommends keeping mulch and debris back from the foundation, especially near entrances.
Yellow outdoor lights attract fewer earwigs than white ones, according to the UC program.
A Calm Checklist
- Check plants outside, in daylight, one at a time.
- Look under the pot and empty the saucer.
- Clear debris and weeds from the soil surface.
- Turn over leaves and check stems, buds and flowers.
- Set a rolled newspaper by each pot for a night or two.
- Rinse and wipe the plant and the pot.
- Keep returning plants apart and check them at each watering.
- Water by need, and expect the soil to dry more slowly indoors.
A little patience at the door keeps your indoor garden calm all winter.
The plants come back refreshed from their summer outside.
The bugs stay where they belong.
Sources and Further Reading
- UC Statewide Integrated Pest Management Program — Pillbugs and Sowbugs: supports where pillbugs and sowbugs hide, what they eat, and the advice on organic matter, moisture and sealing entry points.
- UC Statewide Integrated Pest Management Program — Pest Notes: Earwigs: supports earwig hiding places including flowerpots, night feeding, newspaper traps and yellow outdoor lights.
- UC Statewide Integrated Pest Management Program — Springtails: supports letting potting soil dry between waterings and keeping saucers empty.
- University of Maryland Extension — Watering Indoor Plants: supports watering by need, the two-inch soil check and never leaving pots in water.