
Many people avoid pruning because they worry about cutting the wrong branch.
So the shrubs by the front door keep growing until they cover the windows.
Pruning is gentler and more forgiving than it looks.
A few clear rules tell you what to cut, where to cut, and when.
A well-pruned shrub should not even look pruned.
It simply looks healthy, open, and in proportion with the house.
This guide follows the pruning shrubs fact sheet from Clemson Cooperative Extension.
We turn it into a calm routine you can follow with a pair of hand pruners.
What You Need
- Sharp bypass hand pruners for stems up to about the width of a finger.
- Loppers for thicker branches.
- A small pruning saw for old, woody stems.
- Gloves and safety glasses.
- A tarp or bucket for the clippings.
Sharp tools make clean cuts that heal well.
Dull blades crush stems and leave ragged wounds.
Wipe the blades clean after working on a shrub that looks diseased.
The Goal of Pruning
Clemson Extension describes a properly pruned shrub as a work of art.
The cuts should be hidden inside the plant, covered by the leaves that remain.
You are not trying to give the shrub a haircut.
You are removing the parts that do not belong and letting light into the center.
A shrub with light inside stays leafy from top to bottom.
Step 1: Remove the Dead, Damaged and Diseased
Every pruning session starts here.
Clemson Extension says the first step is to remove all dead, diseased, or injured branches.
This can be done at almost any time of year.
Dead stems are usually gray, brittle, and bare.
Scratch the bark lightly with a fingernail if you are unsure.
Green tissue underneath means the stem is alive.
Cut dead branches back to healthy wood or to where they join a larger branch.
Step 2: Remove Crossing and Out-of-Place Branches
Next, look for branches that rub against each other.
Rubbing wears away bark and opens wounds.
Clemson Extension recommends removing branches that cross or touch.
Also remove stems that look out of place, such as a long shoot sticking far out of the shape.
Step back after every few cuts and look at the whole shrub.
It is easy to remove too much when you stare at one spot.
Step 3: Understand the Two Kinds of Cuts
Thinning cuts
A thinning cut removes a branch where it meets a side branch or the main trunk.
Clemson Extension says thinning is usually preferred over heading back.
It encourages new growth inside the shrub.
It also reduces size while keeping a fuller, natural look.
Heading cuts
A heading cut shortens a stem back to a bud.
Shearing is a kind of repeated heading.
Clemson Extension warns that routine shearing creates thick growth on the outside of the plant.
Less light reaches the interior, so the inside turns bare and twiggy.
The shrub can end up looking stemmy and top-heavy.
If you do head back, cut shoots to several different heights rather than one flat line.
Step 4: Make the Cut in the Right Place
Where you cut matters as much as what you cut.
Find a healthy bud facing the direction you want new growth to go.
Usually that is a bud facing outward, away from the center of the shrub.
Clemson Extension recommends cutting on a slight slant, about a quarter inch above that bud.
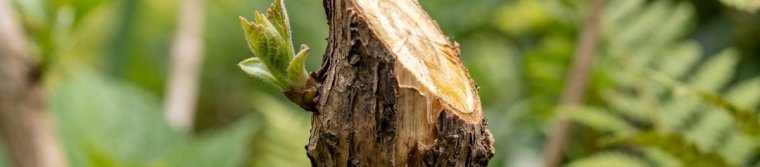
Cutting much higher leaves a stub that can die back.
Cutting too close can damage the bud itself.
For thinning cuts, cut just outside the slight swelling where the branch joins the larger stem.
Step 5: If It Is Still Too Big, Remove the Oldest Stems
Sometimes a shrub is still too dense after the first cleanup.
Clemson Extension suggests removing some of the oldest branches next.
On shrubs with many stems from the base, cut a few of the thickest, oldest stems near the ground.
Younger stems will fill in the space.
This keeps the shrub fresh and blooming without changing its natural shape.
When to Prune: Follow the Flowers
Timing is the part beginners most often get wrong.
The rule is simple once you know when the shrub blooms.
Spring-flowering shrubs
These bloom on growth made the year before.
Clemson Extension says to prune them right after they finish flowering.
Pruning them in winter removes the buds that would have bloomed in spring.
Examples on the Clemson list include azalea, forsythia, bigleaf hydrangea, oakleaf hydrangea, weigela, and flowering quince.
Summer-flowering shrubs
These bloom on growth made in the same season.
Clemson Extension suggests pruning them before spring growth begins.
Examples include butterfly bush, glossy abelia, beautyberry, Japanese spirea, and rose-of-Sharon.
Clemson also lists crape myrtle in this group.
If you are not sure when a shrub blooms, watch it for one season before major pruning.
Bringing Back an Overgrown Shrub
A common mistake is planting a large shrub under a window.
Years later it hides the window and crowds the walkway.
Clemson Extension describes renewal pruning for this situation.
The fast method
Cut the whole shrub back to about 6 to 12 inches above the ground.
Do this before spring growth begins.
Clemson Extension warns that pruning hard in late fall or midwinter can encourage tender growth that cold damages.
New shoots usually appear by midsummer.
When they reach 6 to 12 inches, pinch the tips to encourage branching.
Many broadleaf shrubs respond well, including azaleas, camellias, privet, glossy abelia, and nandina.
The gentle three-year method
For shrubs with many stems, there is a slower and calmer option.
- Year one: cut one third of the oldest stems at ground level.
- Year two: remove half of the remaining old stems, and shorten long new shoots.
- Year three: remove the last of the old wood, and shorten new shoots again.
The shrub stays green and useful the whole time.
Shrubs that do not like hard pruning
Clemson Extension notes that boxwoods, junipers, pines, cypress, cedar, arborvitae, and yews may decline after severe pruning.
For these, light trimming is safer.
If they have truly outgrown the space, moving or replacing them may be a better plan.
Hedges: Keep the Bottom Wider
Hedges have one special rule.
Clemson Extension advises trimming so the base is wider than the top.
A hedge that is narrow at the bottom shades its own lower branches.
Over time those branches lose their leaves and the hedge turns bare at ground level.
Clip formal hedges while the new growth is still green and soft.
An informal hedge needs much less work, with just enough trimming to keep its size.
A Simple Pruning Checklist
- Use sharp, clean tools.
- Start with dead, damaged, and diseased wood.
- Remove crossing and out-of-place branches.
- Prefer thinning cuts over shearing.
- Cut on a slant, a quarter inch above an outward-facing bud.
- Prune spring bloomers after flowering and summer bloomers before spring growth.
- Step back often and stop before you remove too much.
A Calm Way to Begin
Choose one shrub this season and give it a light cleanup.
Watch how it responds over the next few months.
Each year you will feel more confident about the next cut.
Afterward, a fresh layer of mulch around the base helps the shrub settle in.
Small clippings can go into your backyard compost pile.
Sources and Further Reading
- Clemson Cooperative Extension, Home and Garden Information Center — Pruning Shrubs: supports removing dead and crossing wood first, thinning versus heading back, the quarter-inch slanted cut, renewal pruning and its timing, the three-year method, shrubs that dislike hard pruning, hedge shape, and the bloom-season pruning lists.
- UC Statewide Integrated Pest Management Program — Mulches: how mulch around shrubs holds moisture and reduces weeds.